Step 2 in our series on treehouse building!

Blog Post #2 Design
Welcome to the second installment of our blog on treehouse building!
We all have different ideas and visions of what we want out of our treehouse. It might be a place for the kids to hang out, a home office, a guest suite, or simply a place for the adults to hang out and relax. In any event designing can be the most exciting part where you get to put all the things you ever wanted from your past childhood dreams as well as your kid’s current wants.
Step #1
Using the tree selections and layout form the previous blog, start sketching your platform configuration. While doing this, pay attention to possible locations where beams and floor joists can fit in. In Sample #1 below, we drew a very simple layout only showing the outline of where we wanted the major components. This is very helpful because we can start to see how the platform will integrate with the trees, where some of the heavier loads(house) will be, and all the unique aspects of the build like the bridge and the future planned platform.
Sample #1

In sample #2 we took a client’s layout and began placing beams and planning where to connect to the trees with treehouse bolts. Now we can start to get beam and floor joist locations, along with any other major structural components.
Sample #2

In sample #3 we go even further and detail floor joist locations, examine the need for any possible posts, cantilever options, and even call out some bolt sizes. (Take note on how we are leaving gaps around all the trees for future growth and movement.) While it is not called out on the sketch, the standard is a 3” to 4” gap. If you are feeling artistic you can go so far as to draw and exterior view of your planned treehouse. See Sample #3.1 below.
Sample #3

Sample #3.1

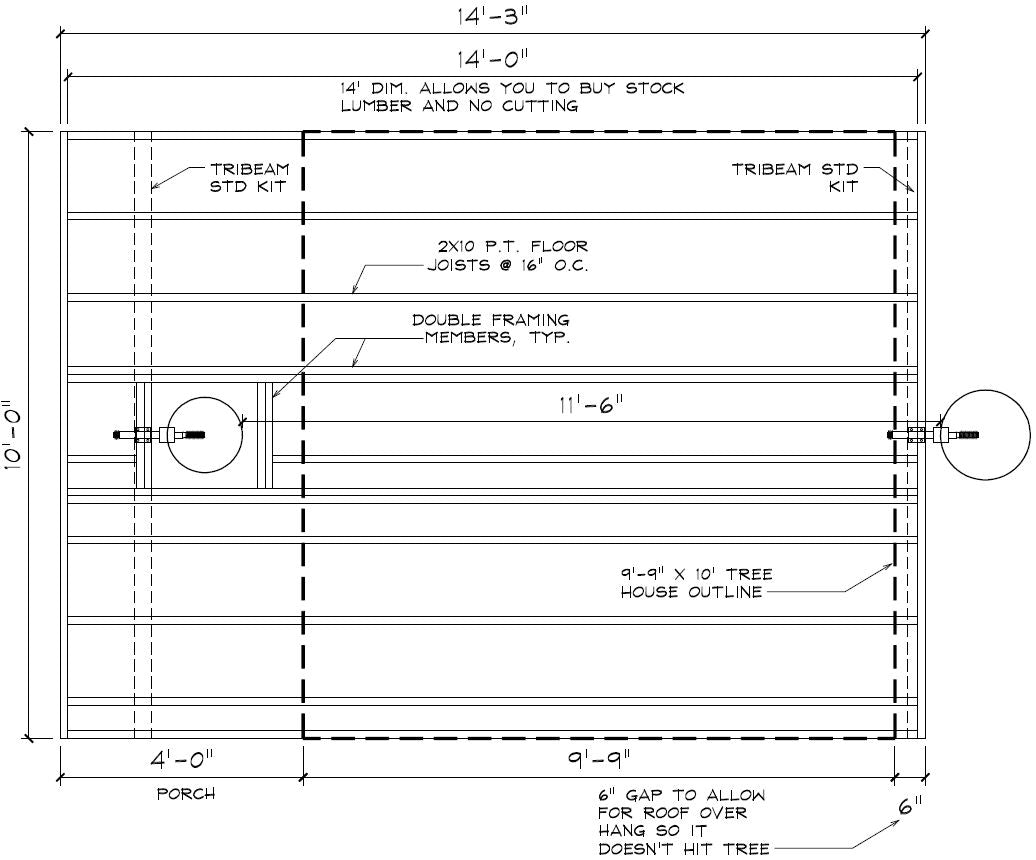
In sample #4 below, the client chose to have us produce a CAD drawn layout of their platform. As you can, see we now have dimensions, detailed bolt connections, brackets, major support call outs, recommended framing sizes, and some specific notes. Keep in mind, this level of detail is not always needed. Many clients feel the hand drawings in sample 3 are fine and can move forward from that point.
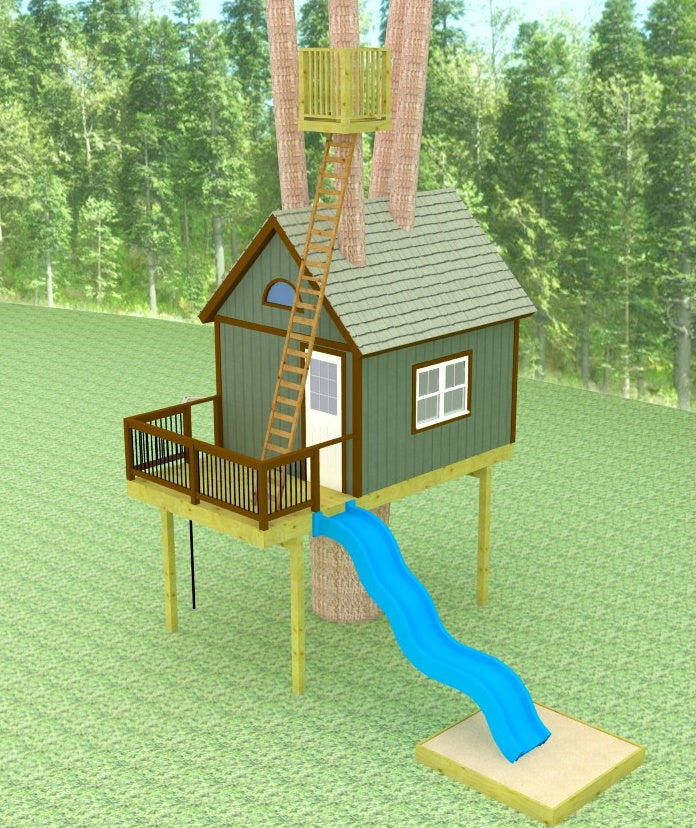
The last images in sample #5 are a bit more advanced, but nothing that can’t be done with some time and practice! These were drawn using a free program called SketchUp that you can download off the internet. Components like the ladder, windows, doors, slide, and net, are all free from their sample library. Once you get the hang of the program, you can really get an idea of what your dream will look like. Hint: You can even use it for home improvements and remodeling!
Sample # 5

Now that you have a design, it’s time to start talking about cost. Stay tuned for the next installment - BUDGETING!
Leave a comment